
How to set up a mail server on VPS

Companies often choose not the best ways of their corporative email hosting, weather they don’t have necessary information or in order to save money. They are storing data on a physical equipment inside a company, or using free services as Google or Yahoo.
In the first case, you sacrifice data security and safety and have to link your mail to a local internet-channel and power grid tightly. In the second case, you use mail on sufferance without flexibility, privacy guarantee and especially without complete control. This is the very case when a negligible economy can lead to the most deplorable consequences for your business.
But you can easily avoid all these risks, if you consider the issue correctly. For example, put your mail on a separate virtual server in a cloud.
What are the advantages of such transference?
1. Guaranteed resources and technical support.
2. Safe storage of a company email on a remote server.
3. The full administrator’s access to mailboxes management.
4. High speed of work and stable access to email server without linking to local internet and power grid.
How to set up a mail server?
Most TuchaCloud clients use a web-server control panel ISPmanager working with email. So, the step by step plan of the actions will be considered on its example.
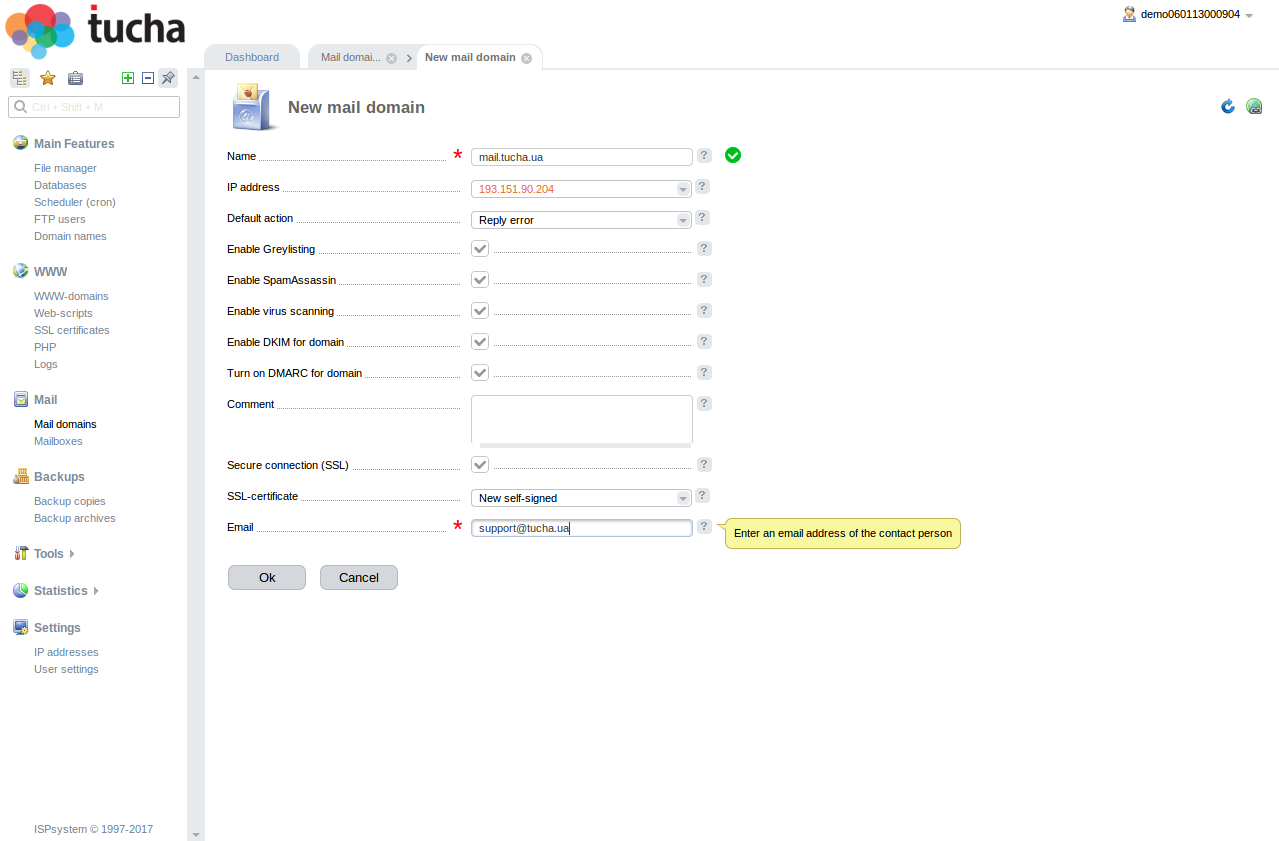
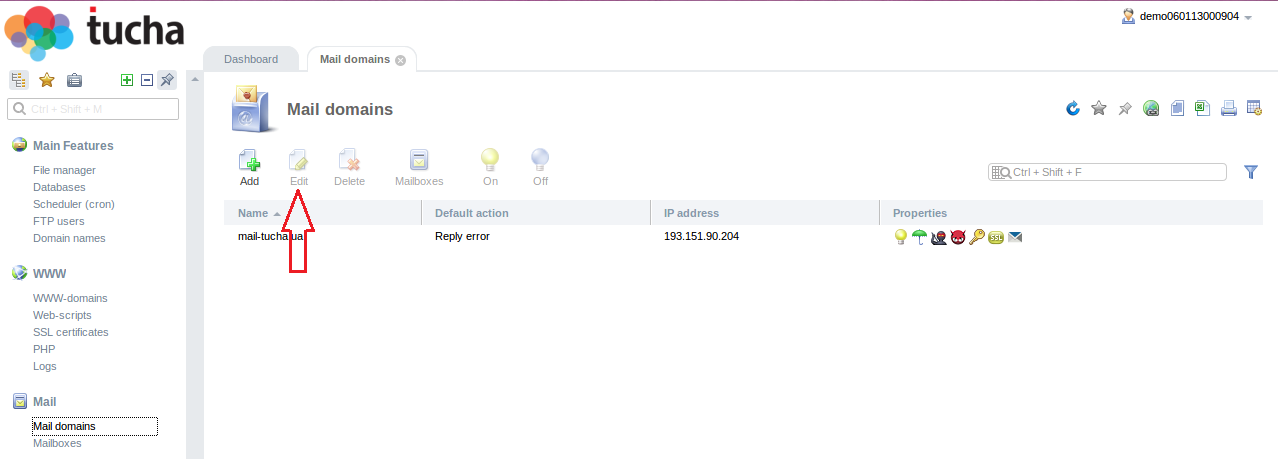
1. Run ISPmanager and open section Mail>Mail Domains. Press Add.
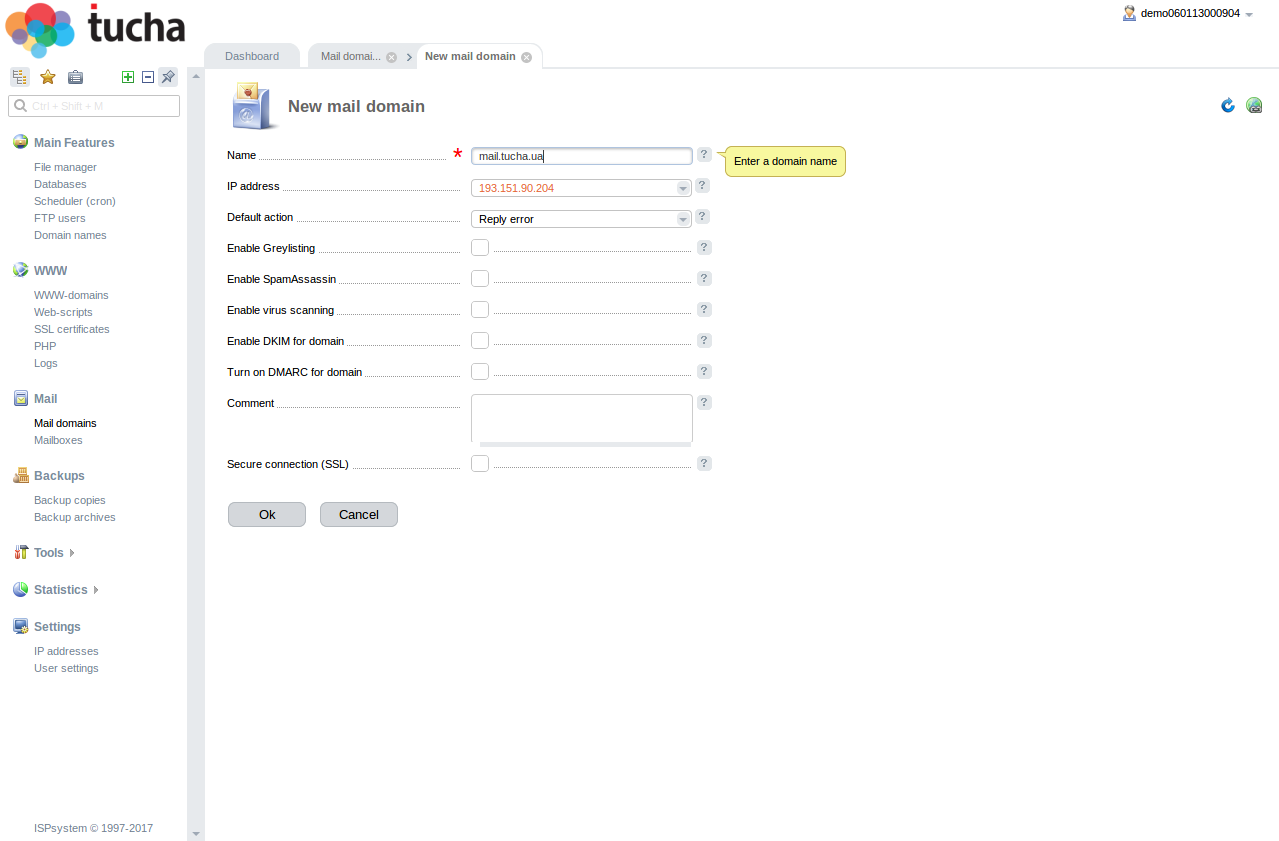
2. Fill in the necessary fields. Pay attention on Default action. Here select what a domain should do if letters go to a non-existent mailbox. Save changes.
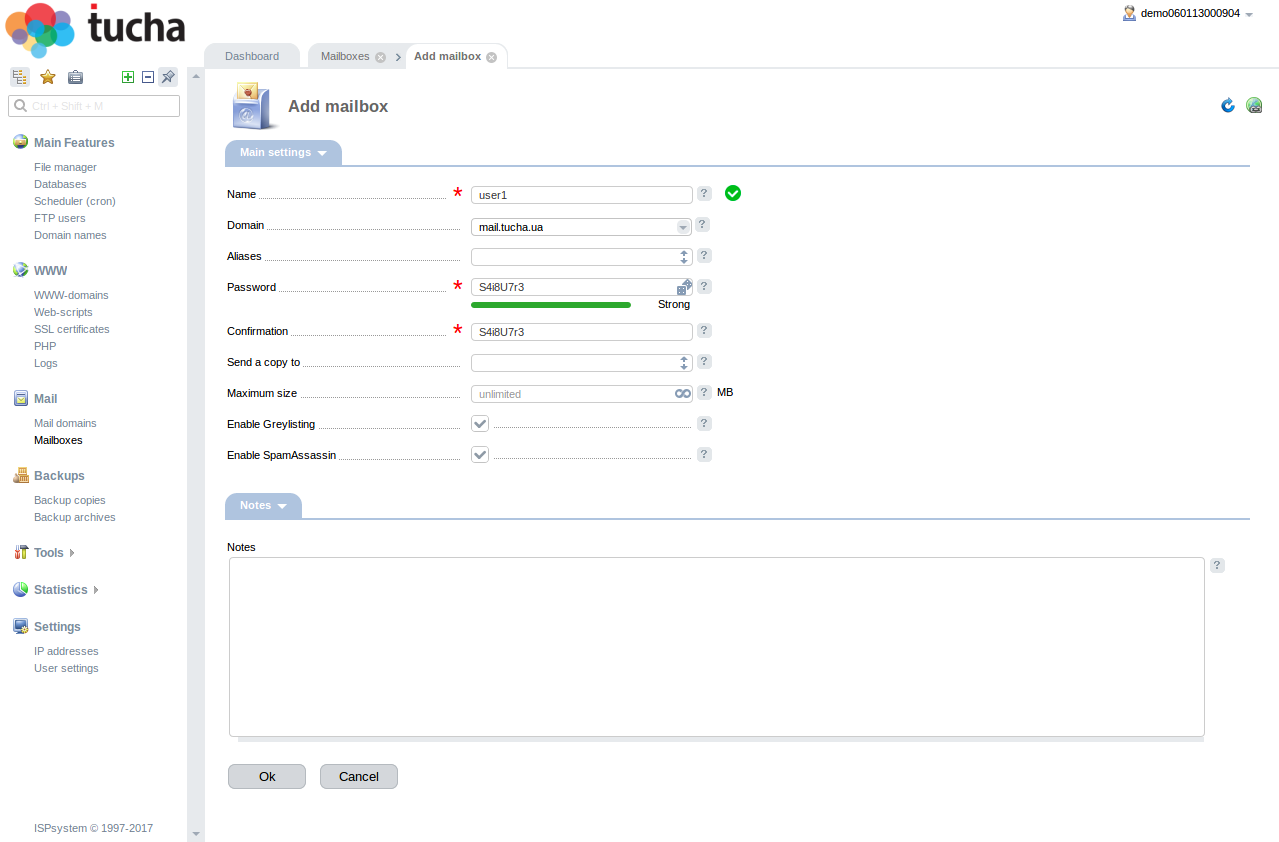
3. Open Mail>Mailboxes and press Add.
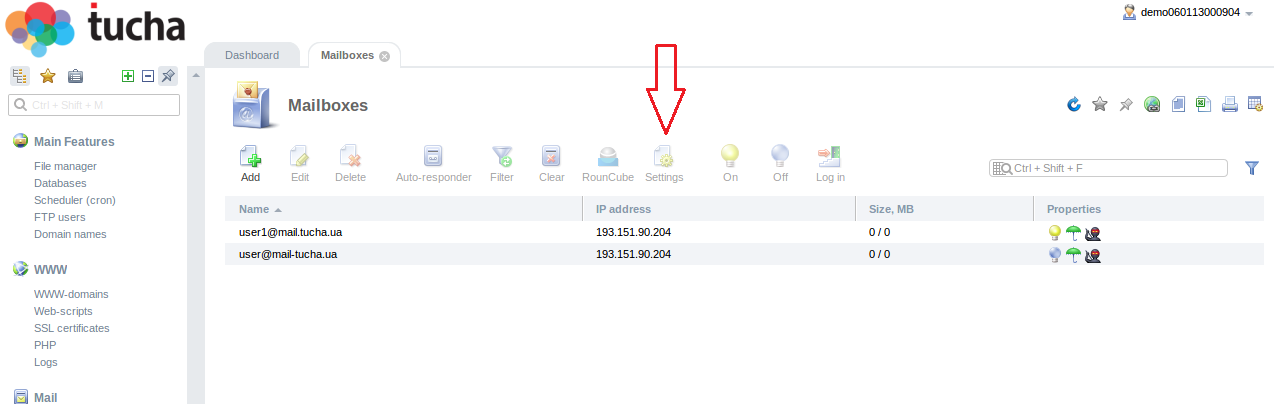
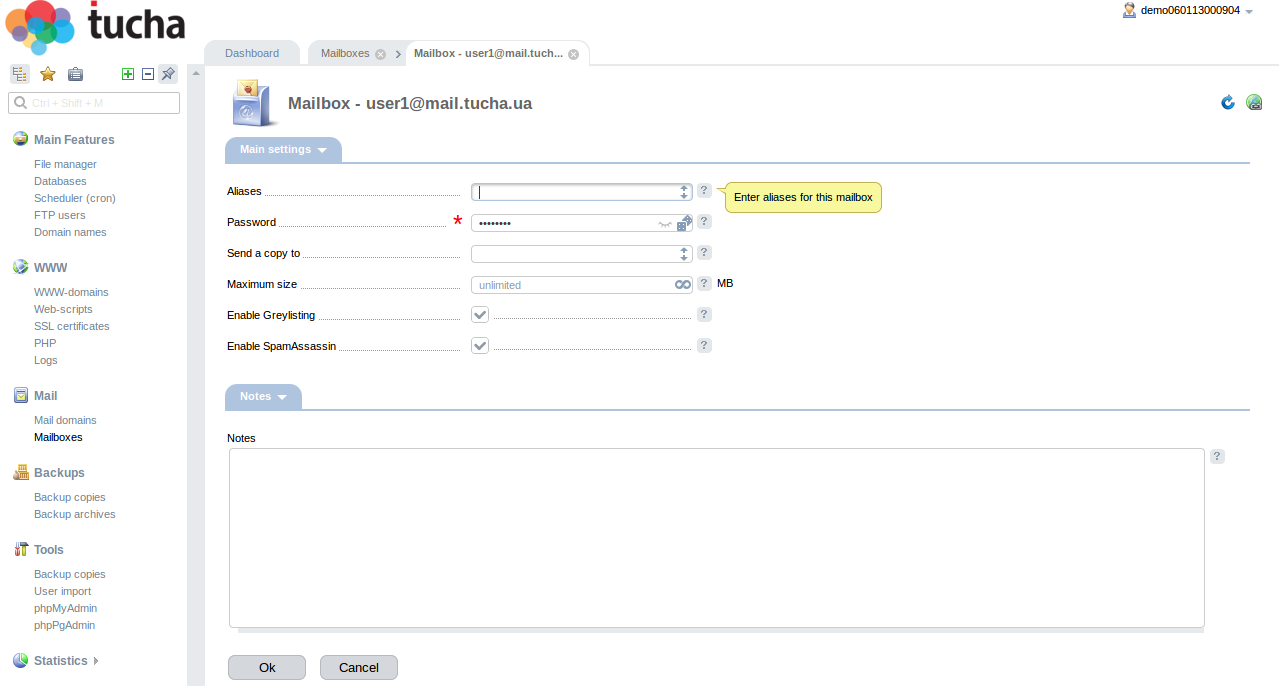
4. Fill in the necessary fields and save changes. In case you’ll need to disable your mail, choose it and press the bulb to turn off (the bulb will be blue).
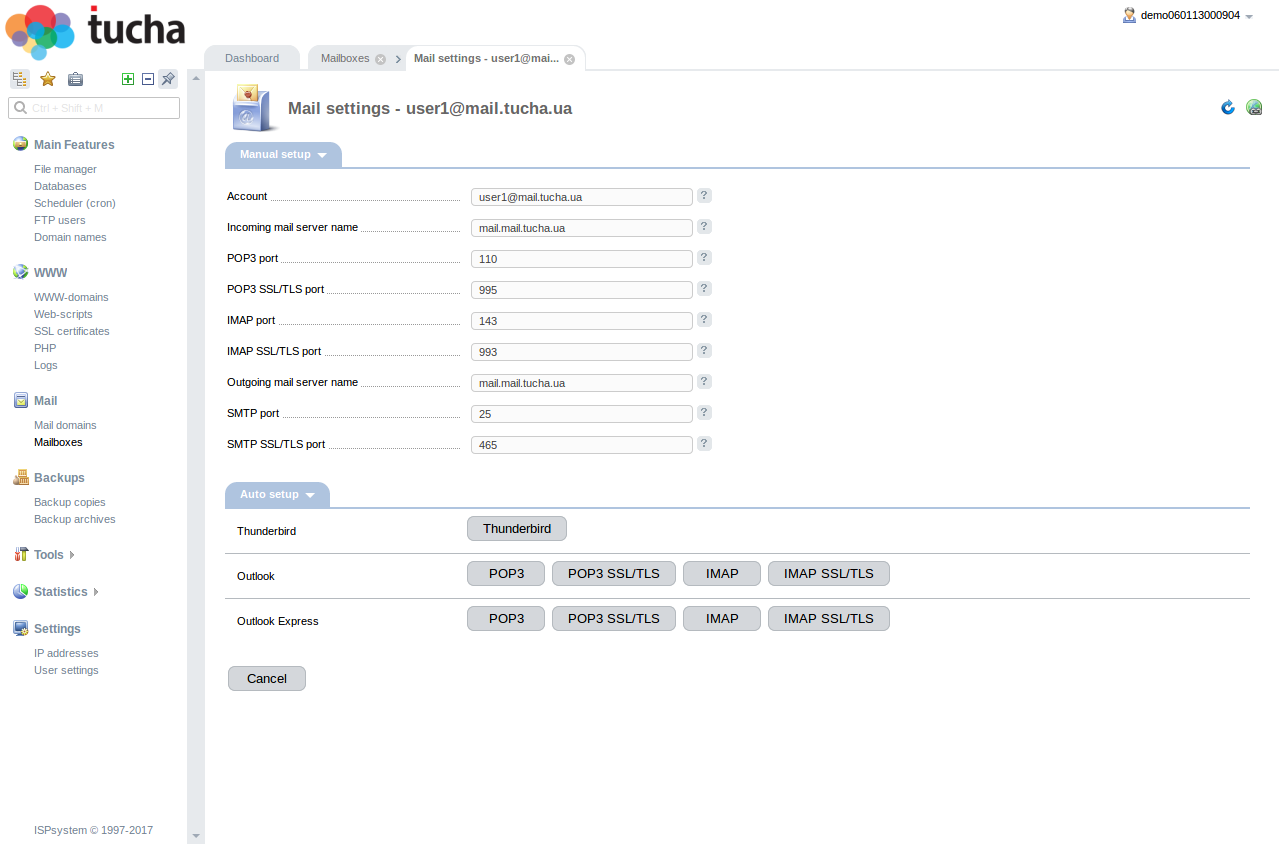
5. Pass to mailboxes Settings.
6. Add created mailbox into mail client.
7. Come back to Mail Domains and press Edit.
8. Activate protective functions: protection from incoming spam (Greylisting and SpamAssassin), enable virus scanning, DKIM and DMARC verification, SSL-certificate (you can use the same one you have on the site). Save changes.
9. You can activate Greylisting and SpamAssassin for separate mailboxes if necessary. For this purpose open Mailboxes and press Edit. Then put the marks in appropriate check-boxes and save changes.
Well, that’s all and your mail server on VPS is set up. As you see, it’s not difficult but very useful. And if you order a server by TuchaCloud it will be even easier, as we’ll assume all set up for you. About this and many other cloud cases connect TuchaCloud specialists for competent consultation 24/7.
No Comment